
Logic Pro Beginner Guide (2026): Learn Logic Pro Step by Step
Starting with a new music production program can feel confusing, especially if you’ve never used a digital audio workstation (DAW) before. Logic Pro is packed with professional tools, but don’t let that intimidate you. The software is designed so that beginners can learn the basics while still giving professionals everything they need to create high-quality music.
The best way to learn Logic Pro isn’t by trying to understand every feature on the first day. Instead, focus on learning the core tools one step at a time. Once you understand how projects, tracks, recording, and editing work, everything else becomes much easier.
This Logic Pro Beginner Guide is written for people who are opening Logic Pro for the first time. By the end, you’ll understand the interface, know how to create your first project, record audio, edit tracks, and export your work with confidence.
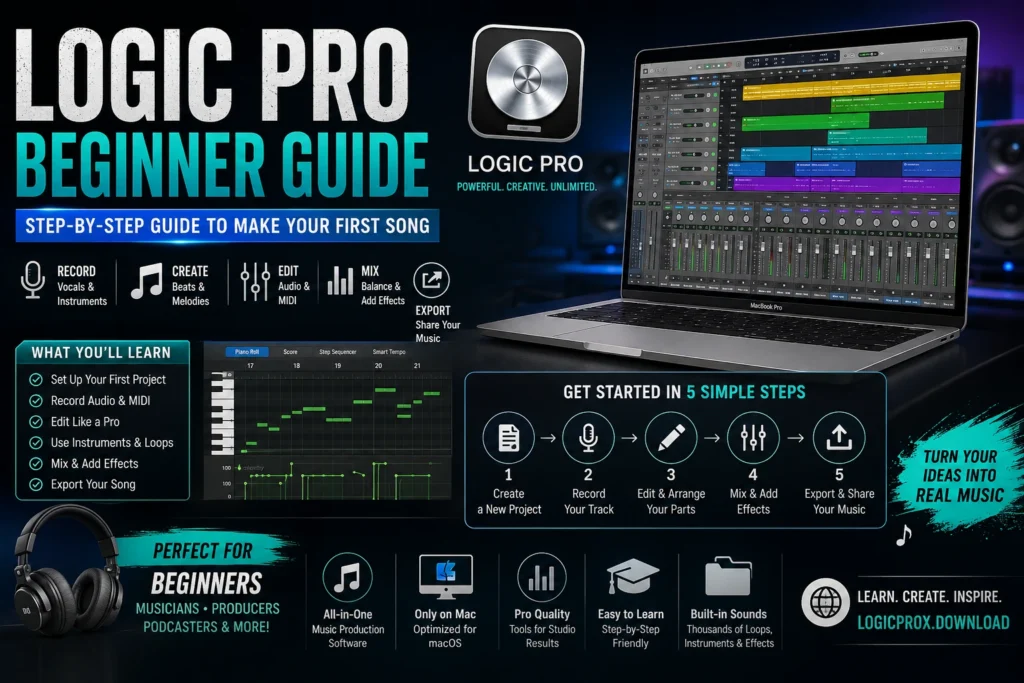
Before You Open Logic Pro
Before creating your first project, make sure your Mac is ready.
A few simple checks can prevent problems later.
Update macOS
Using a supported version of macOS helps ensure Logic Pro runs smoothly and supports the latest features.
Free Up Storage
Music projects, recordings, and sample libraries can take up a lot of space. Keeping enough free storage helps improve performance.
Connect Your Equipment
If you plan to record vocals or instruments, connect your audio interface, microphone, headphones, or MIDI keyboard before opening Logic Pro.
Reduce Background Apps
Closing unnecessary applications frees up system resources and helps prevent slowdowns.
Creating Your First Project
When you launch Logic Pro, you’ll be asked to create or open a project.
For beginners, start with an empty project.
Logic Pro will then ask what type of track you’d like to create.
You’ll usually see options such as:
- Audio Track
- Software Instrument
- Drummer Track
- External MIDI
- Guitar or Bass
Don’t worry too much about choosing the perfect option. You can always add more tracks later.
Once you’ve selected a track, click Create, and your first project is ready.
Understanding the Main Workspace
At first glance, Logic Pro may seem overwhelming, but most beginners only need to learn a few key areas.
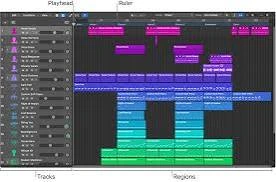
The Track Area
This is where your recordings, MIDI regions, and arrangements appear.
Think of it as the timeline where your song is built.
The Library
The Library contains instrument sounds, presets, and patches.
If you’re using software instruments, this is where you’ll find pianos, drums, synths, guitars, strings, and many other sounds.
The Inspector
The Inspector displays settings for the selected track, including volume, panning, plugins, and channel strip information.
As you become more experienced, you’ll spend more time here.
The Transport Controls
Located at the top of the screen, these buttons allow you to:
- Play
- Stop
- Record
- Rewind
- Fast Forward
You’ll use these controls during nearly every session.
Audio Tracks vs Software Instrument Tracks
This is one of the first concepts every beginner should understand.
Audio Tracks
Audio tracks record real sound.
Examples include:
- Vocals
- Guitar
- Piano recorded with microphones
- Podcasts
- Voiceovers
If sound comes through a microphone or audio interface, you’ll normally use an audio track.
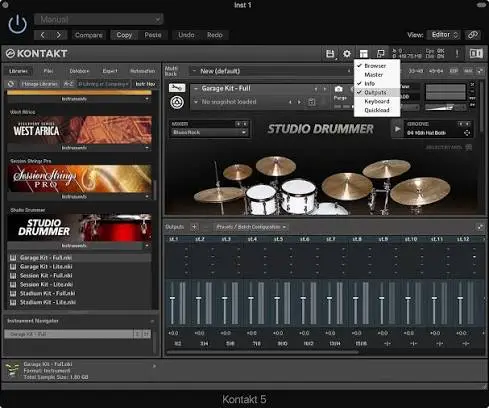
Software Instrument Tracks
These tracks use virtual instruments built into Logic Pro.
Examples include:
- Piano
- Drum kits
- Synthesizers
- Bass
- Strings
- Electronic sounds
Instead of recording sound directly, you’ll play notes using a MIDI keyboard or the Musical Typing feature.
Recording Your First Audio
Recording in Logic Pro is simpler than many beginners expect.
Start by creating an audio track.
Choose the correct microphone input, adjust the recording level, and test your signal.
When you’re ready:
- Click the Record button.
- Perform your recording.
- Press the Spacebar to stop.
- Listen back to your recording.
If you don’t like the result, record another take.
Remember, every producer records multiple takes. It’s a normal part of the creative process.
Saving Your Work
One of the biggest mistakes beginners make is forgetting to save.
After creating your project:
- Save it immediately.
- Give it a clear name.
- Choose an organized folder.
- Save regularly while working.
Getting into this habit can save hours of work if something unexpected happens.
Beginner Tips That Make Learning Easier
You don’t need to become an expert overnight.
Instead, focus on building good habits.
Here are a few suggestions:
- Learn one new tool every day.
- Practice keyboard shortcuts.
- Keep projects organized.
- Experiment with built-in instruments.
- Don’t worry about perfection.
- Finish small projects before starting large ones.
Steady progress is much more valuable than trying to learn everything at once.
Working with Software Instruments
One of the best things about Logic Pro is that you don’t need a room full of expensive equipment to start making music. The software includes a huge collection of virtual instruments that sound professional right out of the box.
When you create a Software Instrument Track, you can choose from many different sounds, including:
- Grand Pianos
- Electric Pianos
- Drum Kits
- Bass Guitars
- Synthesizers
- Strings
- Brass
- Orchestral Instruments
- Acoustic Guitars
- Sound Effects
Simply select an instrument from the Library and start playing using a MIDI keyboard or your Mac keyboard with Musical Typing.
For beginners, exploring different instruments is one of the easiest ways to learn what Logic Pro can do.
Recording with a MIDI Keyboard
A MIDI keyboard doesn’t record sound. Instead, it records musical notes that control virtual instruments inside Logic Pro.
This gives you a lot of flexibility because you can change the instrument even after you’ve finished recording.
For example, you could:
- Record a melody using a piano.
- Switch it to a violin.
- Try it with a synth.
- Turn it into a guitar part.
The notes stay the same while the instrument changes, making it easy to experiment with different ideas.
Editing Your Recording
Nobody gets a perfect recording every time, and that’s completely normal.
Logic Pro includes simple editing tools that help you improve your recordings without starting over.
Some common editing tasks include:
Trimming
Remove unwanted audio from the beginning or end of a recording.
Splitting
Cut a recording into smaller sections so you can edit each part separately.
Moving Regions
Click and drag recordings to place them exactly where you want them.
Copy and Duplicate
If you’ve created a section you like, duplicate it instead of recording it again.
These simple tools save time and make arranging music much easier.
Understanding the Mixer
The Mixer is where all your tracks come together.
Think of it as the control center for your project.
Here you can adjust:
- Volume
- Pan (Left and Right)
- Effects
- EQ
- Compression
- Reverb
- Delay
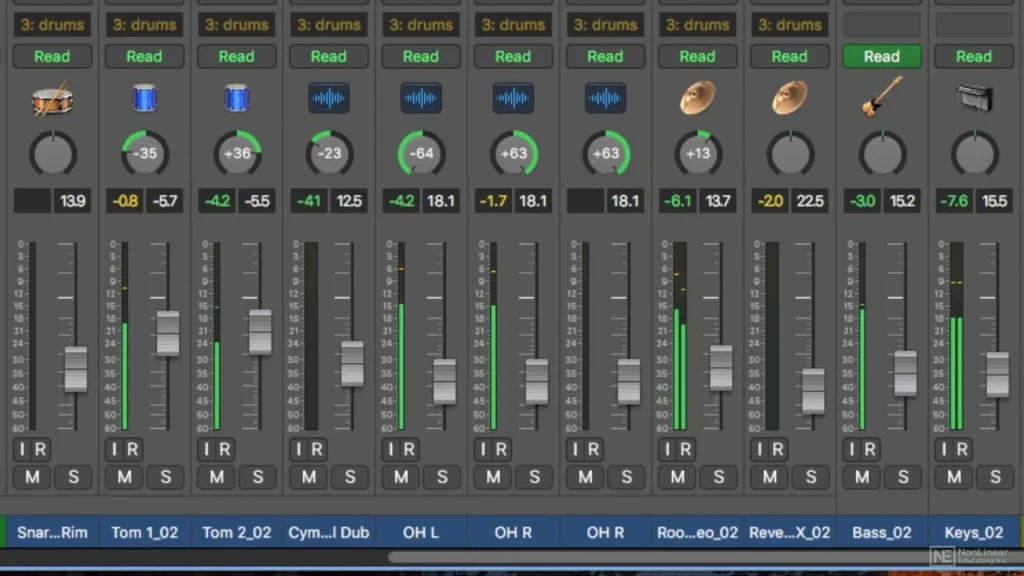
At first, you don’t need to use every option. Simply learning how to balance the volume between tracks will already make your projects sound much better.
Adding Effects
Effects help shape the sound of your recordings.
Logic Pro comes with many built-in effects that are easy to use.
Some of the most popular include:
EQ
EQ lets you adjust different frequencies in your audio.
You can make vocals clearer, reduce unwanted bass, or brighten instruments.
Compression
Compression helps keep the volume of a recording more consistent.
It’s commonly used on vocals, guitars, drums, and podcasts.
Reverb
Reverb creates the feeling of space.
A small amount can make vocals sound natural, while larger settings create a concert hall effect.
Delay
Delay repeats sounds after a short period of time.
It can make guitars, vocals, and synths sound bigger and more interesting.
Working with Loops
If you’re struggling to create your own music, Apple Loops are a great place to start.
Logic Pro includes thousands of royalty-free loops covering many styles, including:
- Pop
- Hip-Hop
- EDM
- Rock
- Lo-Fi
- Jazz
- R&B
- Acoustic
Simply drag a loop into your project and build your song around it.
Many professional producers use loops as inspiration when starting new projects.
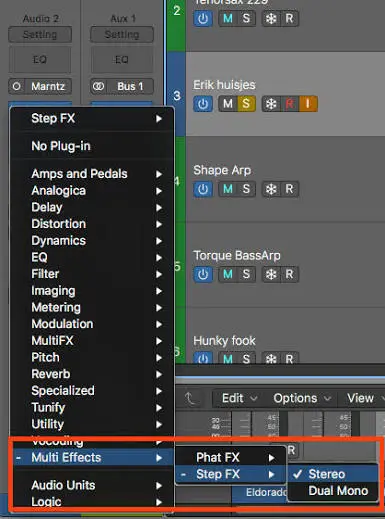
Using Drummer Tracks
One feature that surprises many beginners is Drummer.
Instead of programming every drum hit manually, Logic Pro can generate realistic drum performances in different musical styles.
You can choose genres such as:
- Rock
- Pop
- Hip-Hop
- Electronic
- Alternative
- Songwriter
You can also adjust how energetic or simple the performance sounds with just a few controls.
Organizing Your Project
Keeping your project organized becomes more important as your songs grow.
A few simple habits can save a lot of time later.
Rename Your Tracks
Instead of leaving tracks with default names, give them clear labels like:
- Lead Vocal
- Guitar
- Bass
- Piano
- Kick Drum
- Snare
- Strings
This makes finding tracks much easier.
Use Colors
Logic Pro allows you to assign colors to tracks.
For example:
- Blue for vocals
- Green for guitars
- Yellow for drums
- Purple for keyboards
Color coding helps you navigate large projects more quickly.
Keep Similar Tracks Together
Place drum tracks together, vocals together, and instruments together.
A tidy project is much easier to mix later.
Beginner Mistakes to Avoid
Everyone makes mistakes when learning Logic Pro.
The important thing is recognizing them early.
Avoid these common problems:
- Recording with the input level too high.
- Forgetting to save your work.
- Using too many plugins at once.
- Ignoring project organization.
- Trying to mix before finishing the arrangement.
- Downloading unnecessary third-party plugins too early.
Focus on learning the built-in tools first. Logic Pro already includes almost everything a beginner needs.
Practice Is More Important Than Perfection
Many beginners spend hours watching tutorials without actually making music.
The fastest way to improve is to open Logic Pro every day—even if it’s only for 20 or 30 minutes.
Create small projects.
Experiment with sounds.
Try different instruments.
Don’t worry if your first songs aren’t perfect. Every experienced producer started the same way.
Each project teaches you something new, and over time those lessons add up into real progress.
Mixing Your First Song
Once you’ve recorded your vocals and instruments, the next step is mixing. Mixing is the process of making every track work well together so your song sounds balanced and clear.
Many beginners think mixing is difficult, but it doesn’t have to be. Start with the basics before learning advanced techniques.
A simple mix usually focuses on four things:
- Volume
- Panning
- EQ
- Compression
Mastering these four tools will improve your music much more than using dozens of plugins.
Step 1: Balance the Volume
Before adding any effects, adjust the volume of each track.
Ask yourself:
- Can you hear the vocals clearly?
- Are the drums too loud?
- Is the bass overpowering everything?
- Do the instruments support the song instead of covering it?
A good volume balance is the foundation of every great mix.
Step 2: Use Panning
Panning lets you place sounds across the stereo field.
Instead of keeping everything in the center, try spreading instruments naturally.
For example:
- Lead Vocal – Center
- Kick Drum – Center
- Bass – Center
- Rhythm Guitar – Left
- Piano – Right
- Backing Vocals – Slightly Left and Right
This creates a wider, more professional sound.
Step 3: Apply EQ
EQ (Equalizer) helps shape the tone of each track.
You don’t need to make big adjustments. Small changes often produce the best results.
For example:
- Remove unwanted low frequencies from vocals.
- Brighten acoustic guitars.
- Add clarity to keyboards.
- Reduce muddiness in the mix.
Always listen carefully instead of making changes just because you think you should.
Step 4: Add Compression
Compression controls the dynamic range of a recording.
In simple terms, it helps keep loud and quiet parts more consistent.
It’s especially useful for:
- Vocals
- Bass
- Acoustic guitar
- Podcasts
- Drums
Use gentle compression at first. Too much compression can make a track sound flat and lifeless.
Using Reverb and Delay
Reverb and delay are two of the most popular effects in Logic Pro.
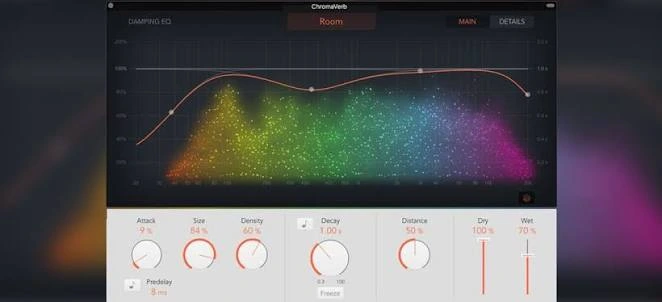
Reverb
Reverb adds a sense of space, making recordings sound more natural.
A little reverb can make vocals feel warm and polished.
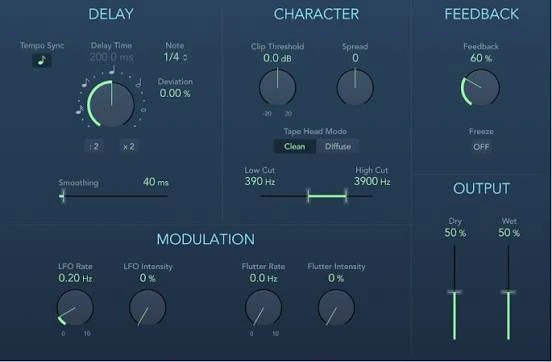
Delay
Delay repeats a sound after a short time.
It works well on:
- Lead vocals
- Guitar solos
- Synth melodies
Use these effects carefully. Too much can make a mix sound cluttered.
Exporting Your Finished Project
When your song is complete, you’ll want to export it.
Logic Pro makes this easy.
Basic Export Steps
- Save your project.
- Select the section you want to export.
- Open the export menu.
- Choose your preferred format.
- Select a destination folder.
- Export the file.
For sharing online, common formats include:
- WAV (high quality)
- AIFF (uncompressed)
- MP3 (smaller file size)
Choose the format that best suits your needs.
Keyboard Shortcuts Every Beginner Should Know
Learning a few shortcuts can save a surprising amount of time.
| Shortcut | Action |
|---|---|
| Spacebar | Play / Stop |
| R | Start Recording |
| Command + S | Save Project |
| Command + Z | Undo |
| Command + C | Copy |
| Command + V | Paste |
| Delete | Remove Selected Item |
| X | Open Mixer |
| P | Open Piano Roll |
| E | Open Audio Editor |
You don’t need to memorize them all at once. Start with the ones you use every day.
Keep Your Projects Organized
Good organization becomes more important as your projects grow.
Here are a few simple habits:
- Name every track clearly.
- Create folders for each project.
- Save different versions as your song develops.
- Back up important projects regularly.
- Remove unused recordings to keep sessions tidy.
A well-organized project is much easier to edit and mix later.
Continue Learning
Logic Pro has hundreds of powerful features, but don’t feel pressured to learn everything immediately.
Instead, focus on one new skill at a time.
After you’ve mastered the basics, you can explore:
- Automation
- MIDI Editing
- Flex Time
- Flex Pitch
- Smart Controls
- Live Loops
- Sampler
- Surround Audio
- Dolby Atmos Mixing
- Advanced Plugin Chains
Every new project is an opportunity to learn something different.
FAQS
Is Logic Pro good for complete beginners?
Yes. While it includes professional tools, beginners can start with the basic features and gradually learn more advanced techniques.
Do I need a MIDI keyboard?
No. A MIDI keyboard is helpful, but you can create music using your Mac keyboard, mouse, and built-in software instruments.
How long does it take to learn Logic Pro?
Most beginners become comfortable with the basics after a few weeks of regular practice. Becoming highly skilled takes more time and experience.
Does Logic Pro include free instruments?
Yes. Logic Pro comes with a large collection of built-in instruments, loops, effects, and sounds that are included with the software.
Can I record vocals in Logic Pro?
Absolutely. Logic Pro is widely used for recording vocals, instruments, podcasts, and voiceovers.
Should beginners install extra plugins?
Not at first. Logic Pro already includes high-quality effects and instruments. Learning the built-in tools before adding third-party plugins is usually the best approach.
Final Thoughts
Learning Logic Pro doesn’t happen overnight, and that’s perfectly normal. Every experienced producer started by learning the same basics—creating projects, recording tracks, editing audio, and experimenting with different sounds.
The most important thing is to practice regularly. Open Logic Pro, try new ideas, and don’t be afraid to make mistakes. Every project you complete will teach you something new and help you become more confident with the software.
As your skills grow, you’ll naturally move from simple recordings to more advanced techniques like automation, mixing, sound design, and mastering. The journey takes time, but it’s also one of the most rewarding parts of music production.
If you keep learning step by step and enjoy the creative process, Logic Pro can become a powerful tool for bringing your musical ideas to life.
 Reliable Knowledge, Fresh Perspectives